Reseller Settings: Difference between revisions
Jump to navigation
Jump to search
No edit summary |
No edit summary |
||
| Line 1: | Line 1: | ||
This page explains how to use and activate Reseller Settings | This page explains how to use and activate Reseller Settings | ||
*Go to SUB ACCOUNTS in the top right menu the | *Go to SUB ACCOUNTS in the top right menu the | ||
[[Image:Go-to-SUB-ACCOUNT.png|500px|link=]] | |||
[[Media:Go-to-SUB-ACCOUNT.png|view large]] | |||
*Go to "Reseller Settings" | *Go to "Reseller Settings" | ||
[[Image:Go-to-SUB-ACCOUNT.png|700px|link=]] | |||
[[Media:Go-to-SUB-ACCOUNT.png|view large]] | |||
*Enter the name of the subdomain you want to use ( e.g. bookings.mydomain.com) | *Enter the name of the subdomain you want to use ( e.g. bookings.mydomain.com) | ||
*Enter your Business name, the marketing URL for the "powered by" link | *Enter your Business name, the marketing URL for the "powered by" link | ||
| Line 15: | Line 25: | ||
Please note that a fee applies if you want to use this feature. You can see the fee in SUB ACCOUNTS -> MANAGE ACCOUNT | Please note that a fee applies if you want to use this feature. You can see the fee in SUB ACCOUNTS -> MANAGE ACCOUNT | ||
[[Image:Reseller-Settings---White-Label-for-Resellers.png|500px|link=]] | |||
[[Media:Reseller-Settings---White-Label-for-Resellers.png|view large]] | |||
[[Image:Go-to-SUB-ACCOUNT.png|500px|link=]] | [[Image:Go-to-SUB-ACCOUNT.png|500px|link=]] | ||
[[Media:Go-to-SUB-ACCOUNT.png|view large]] | [[Media:Go-to-SUB-ACCOUNT.png|view large]] | ||
Revision as of 15:52, 29 January 2015
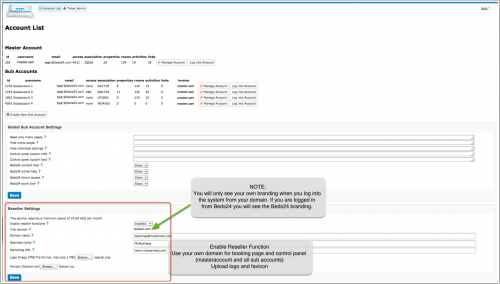
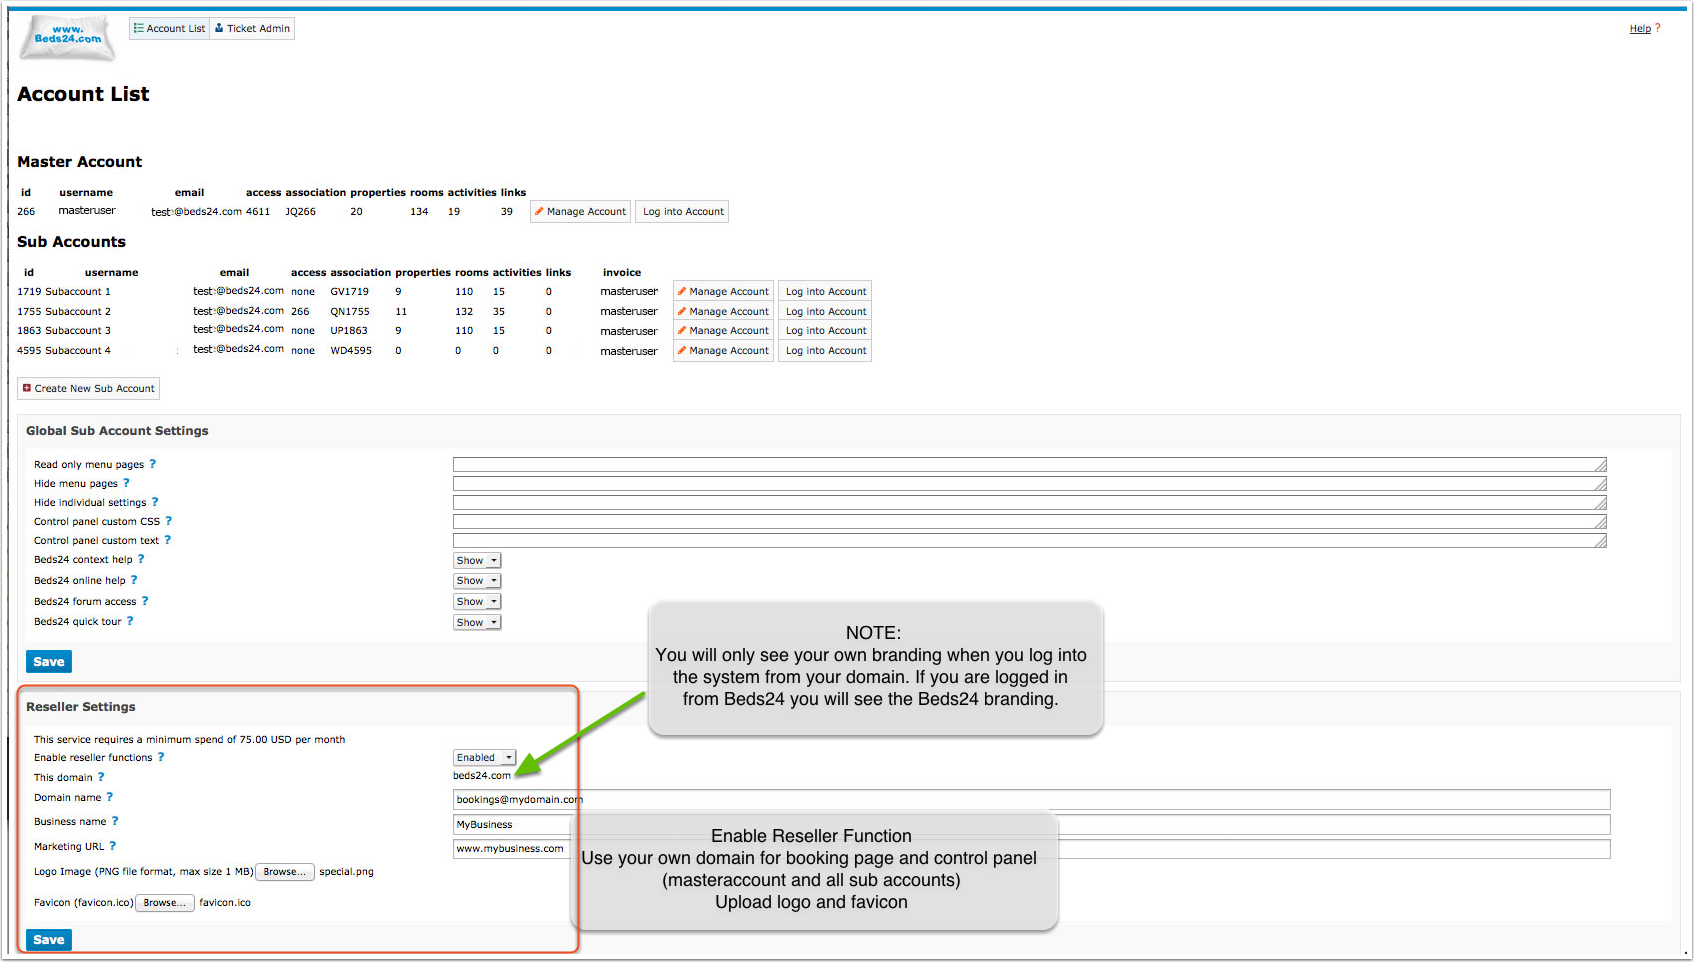
This page explains how to use and activate Reseller Settings
- Go to SUB ACCOUNTS in the top right menu the
- Go to "Reseller Settings"
- Enter the name of the subdomain you want to use ( e.g. bookings.mydomain.com)
- Enter your Business name, the marketing URL for the "powered by" link
- Upload your logo (PNG file format, max size 1 MB)
- Upload your favicon (favicon.ico)
- Set to "Enabled"
- If you need a secure page you will need SSL. Click here for more information
Your logo and Favicon are only visible when you log into the system from your own domain.
For instructions how to create and manage sub accounts for your customers please refer to the sub accounts section.
Please note that a fee applies if you want to use this feature. You can see the fee in SUB ACCOUNTS -> MANAGE ACCOUNT