Difference between revisions of "Category:Bookings"
| Line 22: | Line 22: | ||
Click on the ADD BOOKING Button on the top right. Alternatively you can add bookings in DASHBORARD -> ROOM GRID under INVENTORY. | Click on the ADD BOOKING Button on the top right. Alternatively you can add bookings in DASHBORARD -> ROOM GRID under INVENTORY. | ||
| − | |||
== Manage bookings == | == Manage bookings == | ||
Revision as of 08:18, 5 April 2016
This page is about the menu BOOKINGS
Contents
1 Add Bookings
Bookings are entered into the system by the following methods:
- online by your guest using the availability calendars, booking buttons and booking page.
- manually by yourself.
- imported from other channels by the channel synchroniser.
Status
"New" are bookings which have not been opened to view. Once you open them and save or update them the status will change to "Confirmed". In SETTINGS->ACCOUNT PREFERENCES you can set which status you want to apply to new bookings.
Add a new booking
Click on the ADD BOOKING Button on the top right. Alternatively you can add bookings in DASHBORARD -> ROOM GRID under INVENTORY.
2 Manage bookings
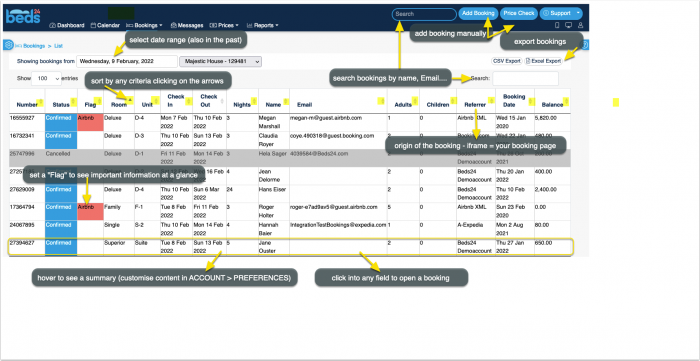
After clicking on BOOKINGS in the top menue you will see your bookings in a a CALENDAR view or LIST view. By default you will see all bookings from today. You can use the selector to view only certain bookings.
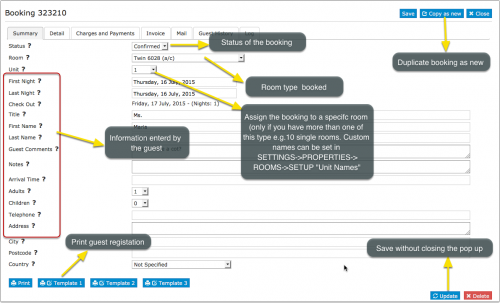
You can edit a booking by clicking on it to open the booking in a popup. When you open the booking you see several tabs:
2.2 Summary
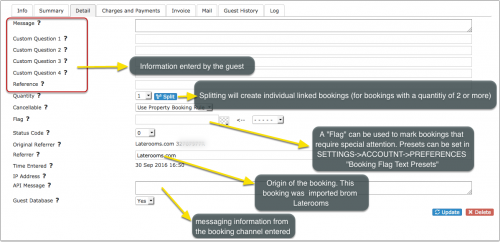
FLAG can be used to flag bookings that require special attention. The flag text is displayed with the other booking fields within the control panel and the [FLAG] template variable can be used to display this text as "hovertext" when the mouse cursor is positioned over the flagged booking in the Calendar view.
Split can be used to split a booking for multiple rooms into separate bookings so each can be assigned to an individual room. All split bookings will be linked so they can be easily managed.
2.3 Charges and Payments
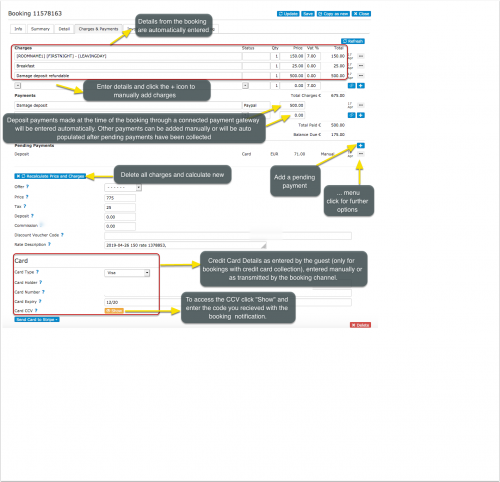
In the tab Charges and Payments you may enter more charges and payments manually.
- Enter chargeable items or and payments. Click Recalculate to update the balance and enter a blank new row.
- To remove an item check the remove box and click Recalculate.
- The balance will be calculated and displayed for this booking in the booking summary.
2.4 Invoice
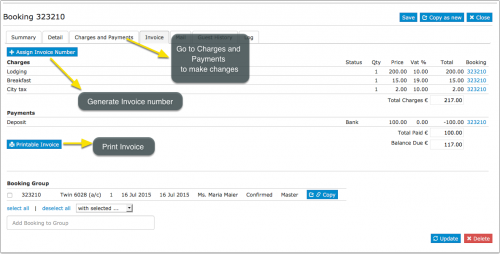
In the tab INVOICE you print an Invoice
- The invoice can also be printed with a message you can specify under SETTINGS -> GUEST MANAGEMENT -> INVOICE
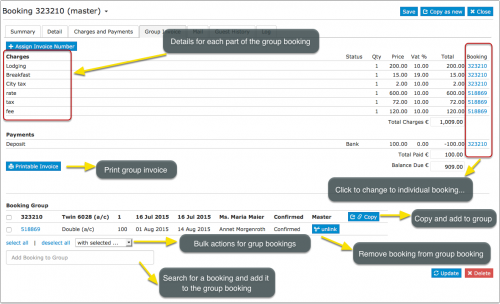
You can also manage and create group bookings.
- Changes have to be made in each individual booking
2.5 Mail
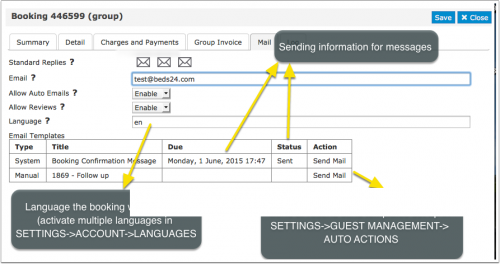
In the tab "Mail" you can send out the standard e-mails you have defined under GUEST MANAGEMENT
2.6 Guests
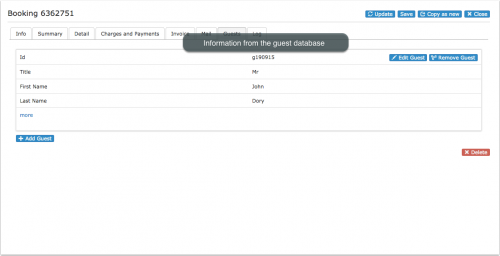
In the tab "Guests" tab you can see information from the guest database (GUEST in top menu)
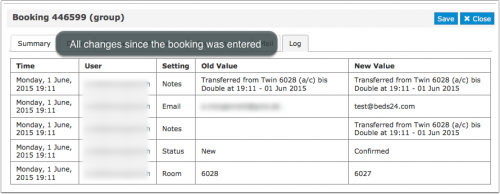
2.7 Logs
The logs shows all changes which have been made.
2.8 Delete Bookings
Deleted bookings are permanently removed from the system and can not be restored.
2.9 Bulk Changes
To bulk change the status of bookings go to SUB ACCOUNT (top right menu) then click on "Manage Account" then "Manage Property" then "Manage Room".
To bulk delete bookings the status has to be changed to "Cancelled" first.
Subcategories
This category has the following 7 subcategories, out of 7 total.
Pages in category "Bookings"
The following 36 pages are in this category, out of 36 total. download this selection of articles as a PDF book
C
S
- Sell a room only if another room is unavailable
- Sell one room as more than one type
- Sell room as dorm and private room
- Sell Rooms with Priority
- Sending data to SEF
- Set Currency
- Stripe Channel Virtual Cards
- Stripe Credit Card
- Stripe deposit and balance
- Stripe full amount
- Stripe Payment Request
- Stripe Payment Schedule
- Stripe Security Deposit capture
